Thursday, November 11, 2010

Meet the Metroneige's grandfather

Last weekend me and Alex rushed down to my grandfather's farm in southern Ontario to pickup what has to be the best present I've ever received. You see I'm getting married in a few months and my grandfather decided that I should have his horseless carriage as an early wedding gift/inheritance. For me this buggy isn't just an amazing toy or another motorized vehicle it's a family heirloom that will be cherished for a long time so don't expect it to show up on a race track any time soon.

    At this point you must be asking yourself what any of this has to do with the Metroneige. Well it's very simple you see, we took this opportunity to take Greg's new trailer out for a good road trial to see how it copes with the open road. We're happy to report that it passes with flying colours, pulling like a dream on the busiest highway in Canada. I don't think the road trip could have gone any better despite the light plug issue we had to resolve on Friday before leaving.


The big surprise of the weekend however was realizing that the 1902 buggy with it's giant wood wheels has a few things in common with our Lemon racer. I can't say much since I've been sworn to secrecy on the inner workings of the drive system, but lets me just say that the Metroneige isn't the only vehicle to have a belt in the drive system.


Friday, October 29, 2010

Validation!

Earlier in the year, the Metroneige team had a bit of a debate on how to deal with "depowering" the front axle on our car: refer to this blog post. It was meant to have driveshafts going to both front wheels, which is nowhere near useful to us. Avid readers will recall that our solution was to remove the driveshaft at the CV joint, and retain the outboard portion of the CV to keep the hub/bearing assembly bolted to the suspension upright.

Fast forward to recently: I have noticed something while looking at a Pontiac Solstice up on the lift. Looking at the suspension uprights I saw this:


Those are the front passenger side uprights. Notice what GM did in the center, I see splines, indicating a FWD origin. The brake caliper is towards the rear, so I'm guessing they are just flipped upside down. Also indicative of this is the fact that the steering rack is on the forward side of the pivot point, and "upside down" as opposed to conventional. Note that the camera is "looking back" from the front of the car.

This brings me to the rear end:


Those are the passenger side rear uprights, which also look identical to the front. The front of the car is towards the left side of those pictures. If you squint a bit, you can imagine this axle-upright combination the way it was designed to be used: FWD! I don't have the correct angle to show you guys but they even use the tie rods as part of the linkages.

Gotta love parts bin engineering.

Conclusion: GM did the same thing to the front suspension on the Kappa platform cars as we did to the Metroneige! So I guess the concept is valid.

Tuesday, October 19, 2010

Another brief work update, this time with pictures. I apologise if I ramble on a bit about details or if this is unclear. Eric and I have put in a few hours since our last update and progress is good. Welding is always fun and rewarding as the transition from planning a panel to finishing one is pretty quick.


We tied the bottom of the rear window frames to the blue part, which was fairly straightforward. I also added a few rectangles around where the hatch bottom is. That portion is done! You can also see where there are patches needed on the rusty portions of the shock towers.


Before/after pictures of welding the floor of the red car to the floor of the blue car. I fully remember why I dislike welding underneath anything. This portion is probably the ugliest of all, but it's solid and isn't going anywhere! On the rightmost edge of the second picture, you can see where the new floor panel is spot welded to the former rear subframe rails. From this portion, we need to make new panels to tie from there to the outside of the car, where the rockers are (or used to be) .


These are top view of where the blue car footwells used to be. These are now one piece with the "new" floor you saw in the pair of pictures showing underneath the car. This is also tied into the transmission tunnel. Everything is now fully tied into the floor of the Metro .

Don't tell Eric (it'll go to his head), but I think he's finally starting to get decent at MIG welding. Next on the to-do list is more patch panels on the rockers, fixing the rust damage on the blue shock towers and a general workspace cleanup. Another scrap metal run is surely in order, as well as deciding/preparing for winter!

Thursday, October 7, 2010

Work update

Not much to say on this front other than having been rained out for 3 consecutive weeks! Our attempts to schedule 2-3 evenings/week have all been pouring rain! This is slightly frustrating and slowing our progress, but such is life!

We are currently on the lookout for a trailer to borrow, as if we can move the car for the winter, we may have access to an indoor location which would extend our "season". I would rather not repeat the U-Haul rental, as it was pretty pricey!

Karting = Life Lessons (part 2)

Sunday, or race day as it's more properly known started early. I don't even get up that early on weekdays, nevermind Sundays. Schedule was:

Registration by 8:30am, "pit" setup soon thereafter.
Practise session at 8:40am
Driver's meeting at 9:30am
Race start 12:50
Race end 2:20

First hiccup was the cancellation of practise session. This negates any possible setup and the chance for Jim to get familiarised with the kart. The race start time also got changed to around 3:30. Now begins the long wait. There was a lot of this going on:


That is, fiddling. A lot of fiddling, taking the time to change the oil, doing maintenance, sprocket setup, fixing the million things that always break on the kart. I think the list of things we did went something like this:
  • Pull engine
  • Remove clutch
  • Clean and deglaze (score) clutch
  • Replace clutch
  • Change drive sprocket
  • Change axle sprocket
  • Modify chain length
  • Fuel pump rebuild
  • Replace fuel hoses
  • Change oil
  • Replace engine
  • Remove carburettor three times to repair throttle linkage
  • Re-adjust throttle cable and pedal stop
  • Clean kart
  • Nut and bolt tightness check
Of course, come race time we completely forgot the basics, like check tyre pressure and check our combined weight average! We got to watch some of the other classes race, including Juniors, who are completely nuts and are as aggressive as you would be playing Mario Kart.

Our driver order was Eric then Jim then Myself, with each of us doing 30 minute stints. This seemed like a lot to me, especially since I found 12 minutes to be long during practise. This did however optimise our driver change time, so I didn't argue too much as decided that I should suck it up!

3:40 race starts! Everything seems to be working, although Eric was visibly not happy about his setup.

Eric (#22) dicing it up!

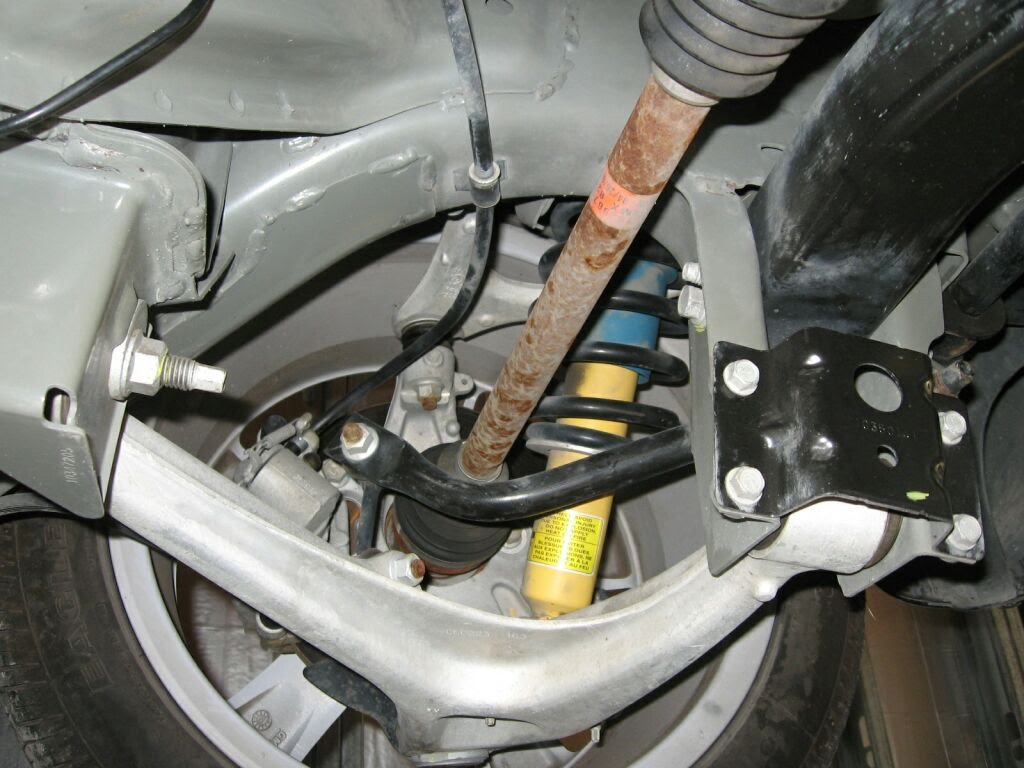
Just as we are about to signal him for the driver change, he misses a turn and end up in the field adjacent to turn 1. Turns out that the left front kingpin bolt decided to shear, leaving him with no steering. (Conspiracy theorists suggest that the bolt may have actually broken during his excursion, but no proof of this is known to exist...). We are out of the running, Jim not even having had his chance!

The race was red flagged moments after our kart failed due to a pretty severe crash near the start line. One of the flagsmen got hit in a rather nasty set of circumstances and the race was cancelled. I am told he will be fine, but the experience was not pleasant for those involved and I'm sure the clubs and organisations involved will have many a debate on how to address the situation.

As far as I'm concerned, the day's events are part of the game, accident included! This certainly puts a lot things into perspective for our Lemons endeavour. It's good to know that our team can handle our fair share of mechanical failure, which is going to be likely! It's also good to know that we can work together, not only in the "shop" but also at the track. Our crisis management is decent and every member can keep a positive attitude when things go awry, which they inevitably always will!

I'll end this post with a few gratuitous shots of Greg's team doing awesome:
Lee(#41) passing on the outside!


Lee (#41) in a nice sandwich

Karting = Life Lessons (part 1)

As some of you may recall, Eric and Greg are the more competitive members of the Metroneige team, as far as motorsports are concerned. Both are active members of the National Capital Karting Club, competing in the Senior Honda class. As such, they have both decided that Jim and Myself suck at driving and need to learn before we get ourselves to an actual Lemons event.

Needless to say we had a few rental days during the year, in what is essentially a fully bumpered version of a box stock Honda kart with crappy tires. I've found these very instructive, have learned a lot and had tons of fun!

Rentals at the Quyon track

Then came the request from Eric: "Hey, why don't we form a team for the club's Enduro race". Simple format, 90 minute race, multiple drivers, one kart. What could go wrong?

In true team spirit, Greg decided to form his own team, because he actually had a chance at a decent showing. He promptly joined another competent driver (you know who you are!), made some good setup decisions and armed his team with sticky tyres of questionable lifespan... They "ended" up in 6th out of 25. More on the finish later.

Greg and his superstar co-driver


Here's the rub, Jim and Myself have never actually driven a proper kart before, nor have we even seen the track we're supposed to race on. Frankly, although Jim did decent on the rental karts, we didn't stand a chance! With an anticipated 25+ karts on a small track at the same time, we really had our work cut out. Compounding the problem was trying to get some practise before the Sunday race...

I ended up getting a few sessions on the Friday prior to the race, using Eric's kart. I say a few because the track opened late, we had several mechanical issues to resolve and generally my not having a clue. I think I faired alright, considering it was my first time, there was a giant puddle blocking half the track in turn 5 which scared the crap out of me and generally adjusting to the speed.

Jim on the other hand couldn't make it to the Friday practise, so went to the Saturday practise. Of course I forgot to mention that I wasn't there, nor was Eric. So he got to try out other karts, which, in hindsight, was MUCH better than nothing.


Friday, September 24, 2010

Tubing!

Quick update,

Our local metal supplier had a customer appreciation sale, 20% off. It's a good time to pick up our rollcage tubing then. It's 1.75"x0.095", all 140 feet of it.


Here is Jim using his ninja moves to unload the truck.

Here again is Jim using his ninja moves to move the tubes up in the attic for storage.


Last interesting little note, the tubing we bought appears to be made in India. I find it hard to believe that the economics for steel are such that the cheapest source is halfway around the world!


Thursday, August 26, 2010

Back on all Fours!!!

I will let pictures do most of the talking on this one, mostly because I cannot explain this elegantly. Not that there is anything remotely elegant about this.

Here is it in all of it's glory, for you skeptics out there, notice the rear bumper and the blue colour in that area.


The back wheels are roughly where they ought to be. We extended the wheelbase by about an inch, the reason being that it made our trimming job much easier. Besides, I don't think it will hurt the handling...too much.


Of course there is still the issue of four wheel steering that we don't need for the race. It does make it very easy to manoeuvre the Metroneige around the yard, so we may keep that feature for a while. We're not quite sure how to remedy to the problem just yet, but I have a few ideas.


For those of you interested in how it's actually holding up, There's a floor extension and side panels welded in. These panels were cut out using paper card templates, trimmed to fit and then screwed into place using good old self tapping sheet metal screws. Once every piece was in position, they were welded using plug welds (a.k.a. rosette welds).


Not everything is fully welded in yet, the floor piece needs more welding and some patches. We're gonna try to get access to a lift to make this easier.


There is still lots of work to be done to the shell to get it ready for the engine transplant, including:
  • Finish rust repair
  • Welding in floor panel completely
  • Gussetting/reinforcements
  • Paint, since winter is gonna get here much faster than we think!

Measurements, Levelling and Patience!

A lot of progress has been made since our last update, I will try to go over it chronologically.

At the end of our last update, I spoke briefly about the difficulties of splicing together two large hunks of metal in a "measured" fashion. Simply moving stuff around is labour intensive due to the mass and shapes. Compounding the problem is our fantastic garage floor:


At this point, we had to give the entire assembly a good once over to make sure all the critical areas were properly ground to bare metal, since access may become more difficult later.

Now the measurement fun begins: The red Geo shell needed to be levelled. We chose two reference lines, one being the topmost of the front shock towers and the second being what's left of the lip where the rear seats used to be. We used a lot of spirit levels and a digital protractor to get everything squared within 0.1 degree (apparently...). Having a lot of hands on deck was very useful for this, as it is a trial and error process.
  • Move jack
  • Lift car
  • Shim jackstands
  • Drop car onto jackstands
  • Measure alignment
  • Repeat
And given about half a day, you end up with this:

Which looks completely unimpressive to the untrained eye. To us however, this was a triumphant moment.

This neatly brings us to finding and marking the centerline of the car. Remember those ancient Egyptian tricks I spoke of last update? Well they came in handy as Eric demonstrates the modern version of the old plumb bob using the nylon string+big socket combo.


Something similar was done to mark the centerline of the Firefly's subframe. Then we lined up the two halves at their respective centers and tacked it in at the shifter and we pinned the back in place using sheet metal screws.


Needless to say that ALL alignments were checked and rechecked at every step in the process. I'm not quite sure how straight the car will actually be in the end, but I think it will be good enough for it's intended purpose. Only a decent alignment will tell. Nobody said this was a good idea...

Thursday, July 29, 2010

Work Weekend!! Day 3 (Creationism)

Day 3

Sunday picks up where Saturday left off, with more noisy cutting and grinding. I would like to take the time to really thank Eric's neighbours for their tolerance and patience!


Some things are best removed with the Sawzall (whose proper name is reciprocating saw, before the Milwaukee Tool Company complains). Yesterday, you saw the car up way high on stands and blocks, we figured the easiest way to go about trial fitting is to lower the Geo onto the new rear end.


Here you can see it's getting close, but there is STILL more trimming needed. Another clearance issue becomes apparent, the shifter location. Let me re-iterate on this a bit, we don't count on being able to use the shifter while running, but it's still needed for gear ratio setup, and the all important reverse gear! I can't speak for the others, but I know I will most definitely need that on the track.


Wheel placement is also at play here: it needs to go where the rear wheels used to be! We are trying to increase the wheelbase slightly, since it probably can't hurt!


After three days worth of work, IT FITS!!! Everything clears nice and tight. I have to thank the original Suzuki design team for helping us, it seems that the angle the body tapers (viewed from top) is the same front to back, which made life much much easier. Also note how we were able to preserve the small beam where the hatch latch goes, and that the bumper is where it should be.


From the inside, you can just about see where the shifter ends up. It's not in the best spot in relation to the seat but you can operate it. You can also see the rough cutout for the snowmobile engine. It will probably go much lower, but for now this is all we could cut without going through the (rear) steering rack mounts.


I think it's maybe time to start talking about structural integrity for this lot, so forgive my ramblings as I try to put this into words. What is key here, is tying the firewall from the Firefly (highlighted in baby blue, ha ha) to the rest of the Geo (in red). First will be joining everything at the floor. This involves tying the floor mounts from the blue bit, into the box section from the red bit. We plan on doing this with a clever box beam of some sort, using some scavenged door crash bars from the Firefly.


Next will be tying up the sides. We want to blue bit on the right to mate nicely to the B-pillar from the red car, and back down to the floor. This I think involves some kind of sheet gusset, going from the side of the blue firewall, to the red B-pillar (at the door), then back down to the floor. The end result of this should like (VERY APPROXIMATELY) like an F1 tub. Yes ladies and gents, I am making an F1 reference on a Lemons project.

Of course, we'll have to accomplish this while measuring and aligning both axles so we end up with a straightish car, while working outside on a soft and uneven dirt and mud surface using basic hand tools and measuring equipment no more sophisticated than the ancient Egyptians had... Of course they did make some pretty cool monuments


Work Weekend!! Day 2

Day 2

Saturday was spent cutting, a lot! We used a few different methods for this, first being the sawzall. Everybody goes on about the sawzall (with the appropriate blade of course) being the weapon of choice for cutting through a car. We also tried the more traditional grinder with cutting wheel, which seemed to wear through very quickly, and with a diamond tipped wheel. The same kind typically reserved for cutting tiles or masonry. This did a fantastic job when cutting through a single layer of sheet, and was easier than the sawzall when it comes to accuracy.

Step one was to make some cardboard templates, to give us a rough idea of what needs to go and what needs to stay. We are trying to keep the outside shell of the car intact, to preserve the appearance of a "normal" Geo. Of course, the plan is to go by trial and error, so we cut up enough so that we think we can get the Firefly part into the Geo, try it, fail, then cut some more... In order to ensure a good fit, we had to do this a lot.


Yours truly, now standing in what used to be the rear subframe. Interesting to note that Geos don't actually have subframes that you can unbolt as such. Everything is welded in, which is great for lightness, but bad for rust. In this case, all of the structurally important boxes were corroding from the inside.


After a few hours of trimming off the back in chunks, you end up with a fair sized hole, which is getting pretty close. The goal here was to be able to wheel the Firefly subframe under the Geo, to physically match things up. You can also see that we left some of the box section (I guess you could call it some kind of beam) that extends aft. The intent here is to use it to tie things together, but we have zero idea on how long this part needs to be.


Finally, after a day's work it sort of fits. In reality, the Geo is jacked up WAY high, as high as the 5-ton jackstands will allow: This makes the roof a few inches taller than a Suzuki SX-4. The major clearance issues to be solved tomorrow are:
  • The length of those boxed sections I mentioned earlier
  • The bottom corners of the fenders, by this I mean where the bumper used to be.
  • The inner fenders need more trimming.
And on to day 3!!!

Monday, July 26, 2010

Work Weekend!! Day 1

We haven't given up on the Metroneige just yet, although it's been a while since our last update: Summer fun does get in the way of progress sometimes, but I digress.

A (nearly) three day push was planned for last weekend. I will be giving you day by day accounts, since work was divided as such.

Day 1

Today's plan was to finish gutting the Firefly, that meant salvaging what we could in terms of parts and sheet metal, then chopping her up ready for disposal. I will let pictures do most of the explaining:

Having the car already split into two halves certainly helped with the job.


.
Draining nasty old gas. Although it's hard to tell, this had turned red from nearly three years of sitting in a rusting tank...


The more clever among you will notice a sweet stiffer spring swap done to the Firefly... actually we decided to keep the original/actual springs. These are supposedly stiffer than the springs on the Metro, and can be adapted to fit (maybe).


The team also managed to finish the patching on the more major rust holes in the floor of the Metro. Yes that is black paint, delicately applied to the floor by dumping it out of the can and wiping it around using paper towels. Eric's reasoning on this is that by integrating some rust particles and dirt to the paint, we can get a free non-slip surface.


Finally, the last accomplishment of the day was cleaning the rust off the Firefly front suspension/axle/assembly thing and trimming it down to the bare essentials.

Thursday, June 10, 2010

Slicing Through the Firefly

In order to maintain a clean workspace, move along with the project, recover some money and re-use some sheet metal, it was time to cut through the Firefly parts car. Nothing fancy really, just a sawzall, some decent blades and a few angle grinders did the trick. I keep being reminded how little there is to a car.


Man, these Fireflies come with everything including the kitchen sink:


Okay before anyone complains about it, we may have artificially the salvage weight of our scrap metal pile... A short trip to the metal recyclers yielded 91$ !!!! We also have to do another trip shortly.

While we're on the topic of work areas, our reader (yes, singular) has asked for a picture of our super garage, well P.G. here it is: